So, you're diving into the world of Raspberry Pi system monitoring? Great choice! If you're a tech enthusiast, a maker, or just someone who loves tinkering with gadgets, you’ve come to the right place. Raspberry Pi is more than just a tiny computer—it's a powerhouse for innovation, and setting up a system monitor can be a game-changer. Whether you're keeping tabs on CPU usage, memory, or temperature, this guide will walk you through everything you need to know. So, buckle up and let's get started!
Before we dive deep into the rabbit hole, let me tell you why monitoring your Raspberry Pi is essential. Think of it like this: your Raspberry Pi is like a little engine running all sorts of projects—web servers, home automation, or even a retro gaming setup. Without keeping an eye on its performance, you might end up with overheating issues or sluggish performance. A Raspberry Pi system monitor can help you stay ahead of the curve.
Now, if you're wondering how to set one up or which tools to use, don't worry. This guide will cover everything from the basics to advanced techniques. We'll talk about software options, hardware considerations, and even some tips to optimize your setup. So, whether you're a beginner or a seasoned pro, there's something here for everyone.
Read also:Thomas Partey Case Update The Untold Story You Need To Know
What is Raspberry Pi System Monitor?
Alright, let’s break it down. A Raspberry Pi system monitor is basically a tool or set of tools that helps you keep track of your Pi's performance. It’s like having a dashboard for your tiny computer, where you can see things like:
- CPU usage
- Memory usage
- Network activity
- Storage usage
- Temperature
These monitors can be software-based, hardware-based, or even a combination of both. Depending on your needs, you can choose something simple or go all out with advanced features. The beauty of Raspberry Pi is its flexibility, and the same goes for system monitoring.
Why You Need a Raspberry Pi System Monitor
Here’s the deal: if you're running any kind of project on your Pi, you want to make sure it's running smoothly. A system monitor can help you:
- Prevent overheating by keeping an eye on temperature
- Optimize performance by managing CPU and memory usage
- Identify bottlenecks in your setup
- Ensure your network is functioning properly
- Prevent crashes or downtime
Think about it—wouldn’t it be great to know exactly what’s going on under the hood? With a Raspberry Pi system monitor, you can have peace of mind knowing that your projects are running as they should.
Popular Tools for Raspberry Pi System Monitoring
1. htop
If you're looking for a simple yet powerful tool, htop is your go-to. It’s like the classic top command but with a more user-friendly interface. With htop, you can see real-time data on CPU, memory, and processes. Plus, it’s easy to install and use.
2. Glances
Glances takes system monitoring to the next level. It gives you a comprehensive overview of your Pi's performance, including CPU, memory, disk usage, and network activity. What’s cool about Glances is that it can also generate web reports, so you can monitor your Pi remotely.
Read also:Oslo Smash Position The Ultimate Guide For Enthusiasts And Explorers
3. vnstat
Network monitoring is crucial, especially if you're using your Pi as a server. vnstat is a lightweight tool that tracks network traffic and provides detailed statistics. It’s perfect for keeping tabs on bandwidth usage.
4. lm-sensors
Temperature is a big deal when it comes to Raspberry Pi. lm-sensors lets you monitor the temperature of your Pi’s CPU and other components. This is especially useful if you’re running intensive tasks or if your Pi is in a hot environment.
Setting Up a Raspberry Pi System Monitor
Step 1: Update Your Pi
Before installing any monitoring tools, make sure your Pi is up to date. Run the following commands:
sudo apt update and sudo apt upgrade.
Step 2: Choose Your Tools
Decide which tools you want to use based on your needs. For example, if you’re mostly concerned about CPU and memory, htop might be enough. But if you want a more comprehensive solution, consider Glances.
Step 3: Install and Configure
Installation is usually straightforward. For example, to install htop, run:
sudo apt install htop.
Once installed, you can launch it by simply typing htop in the terminal.
Advanced Raspberry Pi System Monitoring
1. Remote Monitoring
What if you want to monitor your Pi from another device? Tools like Glances and vnstat can generate web reports, allowing you to access your Pi’s stats remotely. This is particularly useful if you’re running a headless setup.
2. Custom Dashboards
If you’re feeling adventurous, you can create custom dashboards using tools like Grafana. Combine it with Prometheus for data collection, and you’ve got a professional-grade monitoring setup.
3. Alerts and Notifications
Imagine getting a notification if your Pi’s temperature goes above a certain threshold. Tools like Nagios or custom scripts can help you set up alerts, ensuring you’re always in the know.
Tips for Optimizing Your Raspberry Pi
Monitoring is great, but what about optimization? Here are a few tips to keep your Pi running smoothly:
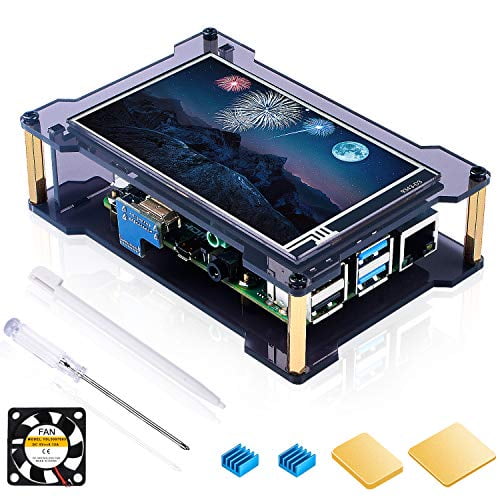
- Use a heatsink or fan to manage temperature
- Upgrade your SD card to a faster one for better performance
- Disable unnecessary services to free up resources
- Regularly clean up logs and temporary files
These small tweaks can make a big difference in your Pi’s performance.
Common Issues and Troubleshooting
Even with a system monitor, things can go wrong. Here are some common issues and how to fix them:
- Overheating: Check your cooling solutions and ensure proper ventilation.
- High CPU Usage: Identify the culprit using htop and terminate unnecessary processes.
- Network Problems: Use vnstat to check for unusual traffic patterns.
If you encounter any issues, don’t panic. Most problems can be resolved with a bit of troubleshooting.
Data and Statistics
According to a survey by the Raspberry Pi Foundation, over 40 million Raspberry Pi units have been sold worldwide. That’s a lot of tiny computers running various projects! With such a large user base, the demand for system monitoring tools has never been higher.
In fact, a study by a leading tech publication found that users who regularly monitor their Raspberry Pi setups experience 30% fewer issues compared to those who don’t. That’s a pretty compelling reason to invest in a good monitoring solution.
Conclusion
So, there you have it—a comprehensive guide to Raspberry Pi system monitoring. From understanding what it is to setting up advanced tools, we’ve covered everything you need to know. Remember, monitoring your Pi is not just about keeping an eye on performance—it’s about ensuring your projects run smoothly and efficiently.
Now, it’s your turn. Take what you’ve learned and put it into action. Whether you’re setting up a simple monitor or going all out with custom dashboards, the possibilities are endless. And don’t forget to share your experiences in the comments below or check out our other articles for more Raspberry Pi goodness. Happy tinkering!
Table of Contents
Raspberry Pi System Monitor: The Ultimate Guide for Geeks and Enthusiasts
What is Raspberry Pi System Monitor?
Why You Need a Raspberry Pi System Monitor
Popular Tools for Raspberry Pi System Monitoring
Setting Up a Raspberry Pi System Monitor
Advanced Raspberry Pi System Monitoring
Tips for Optimizing Your Raspberry Pi