So, you’ve got a Raspberry Pi sitting on your desk, and you’re wondering how to remote connect to Raspberry Pi from Windows? Well, my friend, you’ve come to the right place! In this article, we’ll dive deep into everything you need to know to set up a seamless remote connection between your Windows PC and your Raspberry Pi. Whether you’re a beginner or an advanced user, we’ve got you covered.
Connecting remotely to your Raspberry Pi opens up a world of possibilities. Imagine being able to control your Pi from the comfort of your couch, or even from another room. It’s not just convenient; it’s downright awesome. But before we get into the nitty-gritty, let’s talk about why remote access is such a game-changer.
With remote access, you can manage your projects, monitor your server, or even stream media without needing to be physically present. Plus, who doesn’t love a little tech wizardry? So, buckle up because we’re about to embark on a journey that’ll make you the master of your Raspberry Pi universe.
Read also:Wentworth Miller Relationships A Deep Dive Into Love Life And Legacy
Why Remote Connect to Raspberry Pi from Windows?
Let’s face it—Raspberry Pi is an incredible little device, but sometimes its tiny screen and keyboard setup can feel a bit… well, limiting. That’s where remote connections come in handy. By connecting to your Pi from a Windows machine, you gain access to a larger screen, better keyboard controls, and a more comfortable workspace.
Here are some reasons why you should consider remote connecting to your Raspberry Pi:
- Access your Pi from anywhere in your home or office.
- Work on projects without needing to be tethered to your Pi’s physical location.
- Streamline your workflow by using your Windows PC as a powerful control center.
- Avoid cluttering your desk with multiple monitors and peripherals.
And let’s be honest, it just feels cool to say, “I’m controlling my Raspberry Pi from my laptop.” Trust me, it’s a conversation starter!
Setting Up Your Raspberry Pi for Remote Access
Before you can start remote connecting to Raspberry Pi from Windows, you’ll need to prepare your Pi for the task. This involves a few simple steps that’ll make the process smooth and hassle-free.
Step 1: Install the Latest Raspberry Pi OS
First things first, make sure your Raspberry Pi is running the latest version of Raspberry Pi OS. You can download the latest image from the official Raspberry Pi website and flash it onto your SD card using a tool like BalenaEtcher.
Why does this matter? Well, newer versions of the OS come with updated features and security patches, ensuring a more stable and secure remote connection.
Read also:Unveiling The Secrets Of Pyramid Facing Stones A Journey Through Time
Step 2: Enable SSH on Your Raspberry Pi
SSH (Secure Shell) is the backbone of remote connections. To enable SSH on your Raspberry Pi, follow these steps:
- Boot up your Raspberry Pi and open the terminal.
- Type
sudo raspi-configand hit Enter. - Use the arrow keys to navigate to "Interfacing Options" and press Enter.
- Select "SSH" and enable it.
Once SSH is enabled, you’re ready to move on to the next step. Easy peasy, right?
Understanding SSH and Its Role in Remote Connections
Now that we’ve enabled SSH, let’s take a moment to understand what it is and why it’s so important. SSH is a cryptographic network protocol that allows you to securely connect to a remote device. It’s like a secret handshake that ensures only authorized users can access your Raspberry Pi.
Here’s why SSH is awesome:
- It encrypts all data transferred between your Windows PC and Raspberry Pi.
- It provides a secure way to manage your Pi without exposing it to potential threats.
- It’s super easy to set up and use, even for beginners.
So, whether you’re a tech enthusiast or just someone looking to streamline their workflow, SSH is your new best friend.
Connecting to Raspberry Pi via SSH from Windows
Now that your Raspberry Pi is all set up, it’s time to connect to it from your Windows machine. There are several ways to do this, but one of the most popular methods is using a tool called PuTTY.
Step 1: Download and Install PuTTY
PuTTY is a free and open-source SSH client that makes connecting to your Raspberry Pi a breeze. You can download it from the official PuTTY website. Once downloaded, install it on your Windows PC.
Step 2: Find Your Raspberry Pi’s IP Address
To connect to your Pi via SSH, you’ll need to know its IP address. You can find this by typing hostname -I in the Raspberry Pi terminal. The IP address will usually look something like 192.168.1.10.
Step 3: Connect Using PuTTY
Open PuTTY and enter your Raspberry Pi’s IP address in the "Host Name" field. Set the port to 22 (the default SSH port) and click "Open." You’ll be prompted to log in using your Pi’s username and password. Voilà! You’re now connected.
Pro tip: If you’re tired of typing in your credentials every time, consider setting up SSH keys for passwordless authentication. It’s a game-changer!
Alternative Methods for Remote Connect to Raspberry Pi from Windows
While SSH is the most common method for remote connections, there are other ways to achieve the same result. Let’s explore a few alternatives:
Option 1: VNC Viewer
VNC Viewer allows you to remotely access your Raspberry Pi’s graphical interface. This is perfect if you prefer a more visual approach to managing your Pi.
- Install the RealVNC server on your Raspberry Pi by running
sudo apt install realvnc-vnc-server. - Download and install VNC Viewer on your Windows PC.
- Enter your Pi’s IP address in VNC Viewer and log in using your credentials.
With VNC, you can interact with your Pi just as if you were sitting right in front of it. Neat, huh?
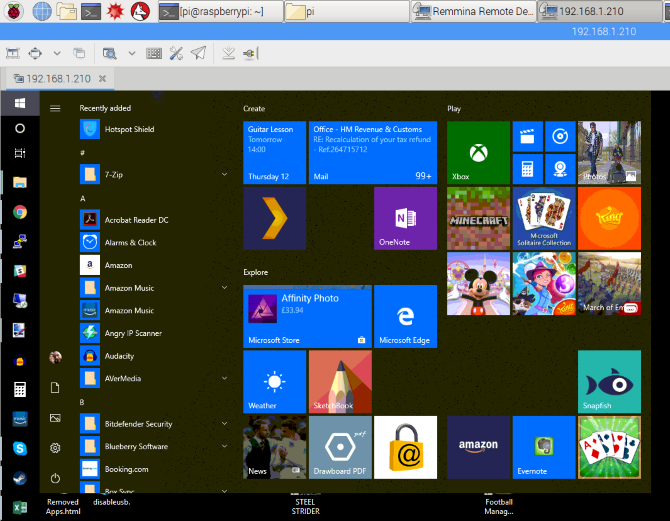
Option 2: Windows Remote Desktop
Windows Remote Desktop is another option for remote connections. While it’s not as lightweight as SSH, it offers a more familiar interface for Windows users.
- Install xrdp on your Raspberry Pi by running
sudo apt install xrdp. - Open Remote Desktop Connection on your Windows PC and enter your Pi’s IP address.
- Log in using your Pi’s username and password.
Windows Remote Desktop is a great choice if you want a seamless experience that feels just like working on a Windows machine.
Troubleshooting Common Issues
Even the best-laid plans can go awry sometimes. If you’re having trouble connecting to your Raspberry Pi from Windows, don’t panic. Here are a few common issues and how to fix them:
Issue 1: Unable to Connect via SSH
If you’re getting an error when trying to connect via SSH, check the following:
- Make sure SSH is enabled on your Raspberry Pi.
- Verify that your Pi’s IP address is correct.
- Ensure that your Windows firewall isn’t blocking the connection.
Issue 2: VNC Connection Fails
If VNC isn’t working, try these troubleshooting steps:
- Restart the VNC server on your Raspberry Pi.
- Check that your network connection is stable.
- Make sure the VNC Viewer app is up to date.
Remember, patience is key. Sometimes it just takes a little tweaking to get everything working smoothly.
Security Best Practices for Remote Connections
While remote connections are incredibly useful, they also come with some security risks. Here are a few tips to keep your Raspberry Pi safe:
- Use strong, unique passwords for your Pi.
- Set up SSH keys for added security.
- Keep your Raspberry Pi OS and all installed software up to date.
- Consider using a firewall to restrict access to your Pi.
By following these best practices, you’ll ensure that your remote connections are both convenient and secure.
Advanced Tips for Power Users
If you’re a power user looking to take your remote connections to the next level, here are a few advanced tips:
TIP 1: Automate Your Workflows
Use tools like cron jobs to automate repetitive tasks on your Raspberry Pi. This way, you can focus on more important things while your Pi takes care of the grunt work.
TIP 2: Set Up a Static IP Address
Assigning a static IP address to your Raspberry Pi makes it easier to connect consistently. To do this, edit the /etc/dhcpcd.conf file and add the following lines:
- interface eth0
- static ip_address=192.168.1.10/24
- static routers=192.168.1.1
- static domain_name_servers=192.168.1.1
Replace the IP addresses with those appropriate for your network.
Conclusion: Take Your Raspberry Pi Skills to the Next Level
And there you have it—a comprehensive guide to remote connect to Raspberry Pi from Windows. Whether you’re using SSH, VNC, or Windows Remote Desktop, the possibilities are endless. By following the steps outlined in this article, you’ll be well on your way to mastering the art of remote connections.
So, what are you waiting for? Grab your Raspberry Pi, fire up your Windows PC, and start exploring the world of remote access. And don’t forget to share your experiences in the comments below. We’d love to hear how you’re using your newfound skills!
Happy tinkering, and remember—technology is awesome!
Table of Contents
- Why Remote Connect to Raspberry Pi from Windows?
- Setting Up Your Raspberry Pi for Remote Access
- Understanding SSH and Its Role in Remote Connections
- Connecting to Raspberry Pi via SSH from Windows
- Alternative Methods for Remote Connect to Raspberry Pi from Windows
- Troubleshooting Common Issues
- Security Best Practices for Remote Connections
- Advanced Tips for Power Users
- Conclusion: Take Your Raspberry Pi Skills to the Next Level